Showing posts with label Crafts. Show all posts

December 9, 2014

Yarn Haul: Lion's Pride® Woolspun®

Every year about this time, I make the Guy a hat. You can say it's one of our holiday traditions. The fun part is- I ask the guy to pick up some yarn of his choice, and then I try to come up with a suitable pattern/design with them. The process can be a bit challenging but very worthwhile. It gives me just the right amount of kick in the pants to try out new techniques and learn new stitches.

Yarn Haul: Lion Brand Woolspun

This year Z picked up these two yarns from Michaels. I was quite surprised with his choice cause he's not really a red person. The yarns are Lion's Pride® Woolspun® (from Lion Brand) in Cranberry and Charcoal. The color combination is quite festive! Now all I have to do is come up with a fun pattern. Check back soon to see what I make with them.


You can see last years' hats here on "Hats and more Hats"

December 6, 2014

December 2, 2014

Yarn Haul: Knitpicks

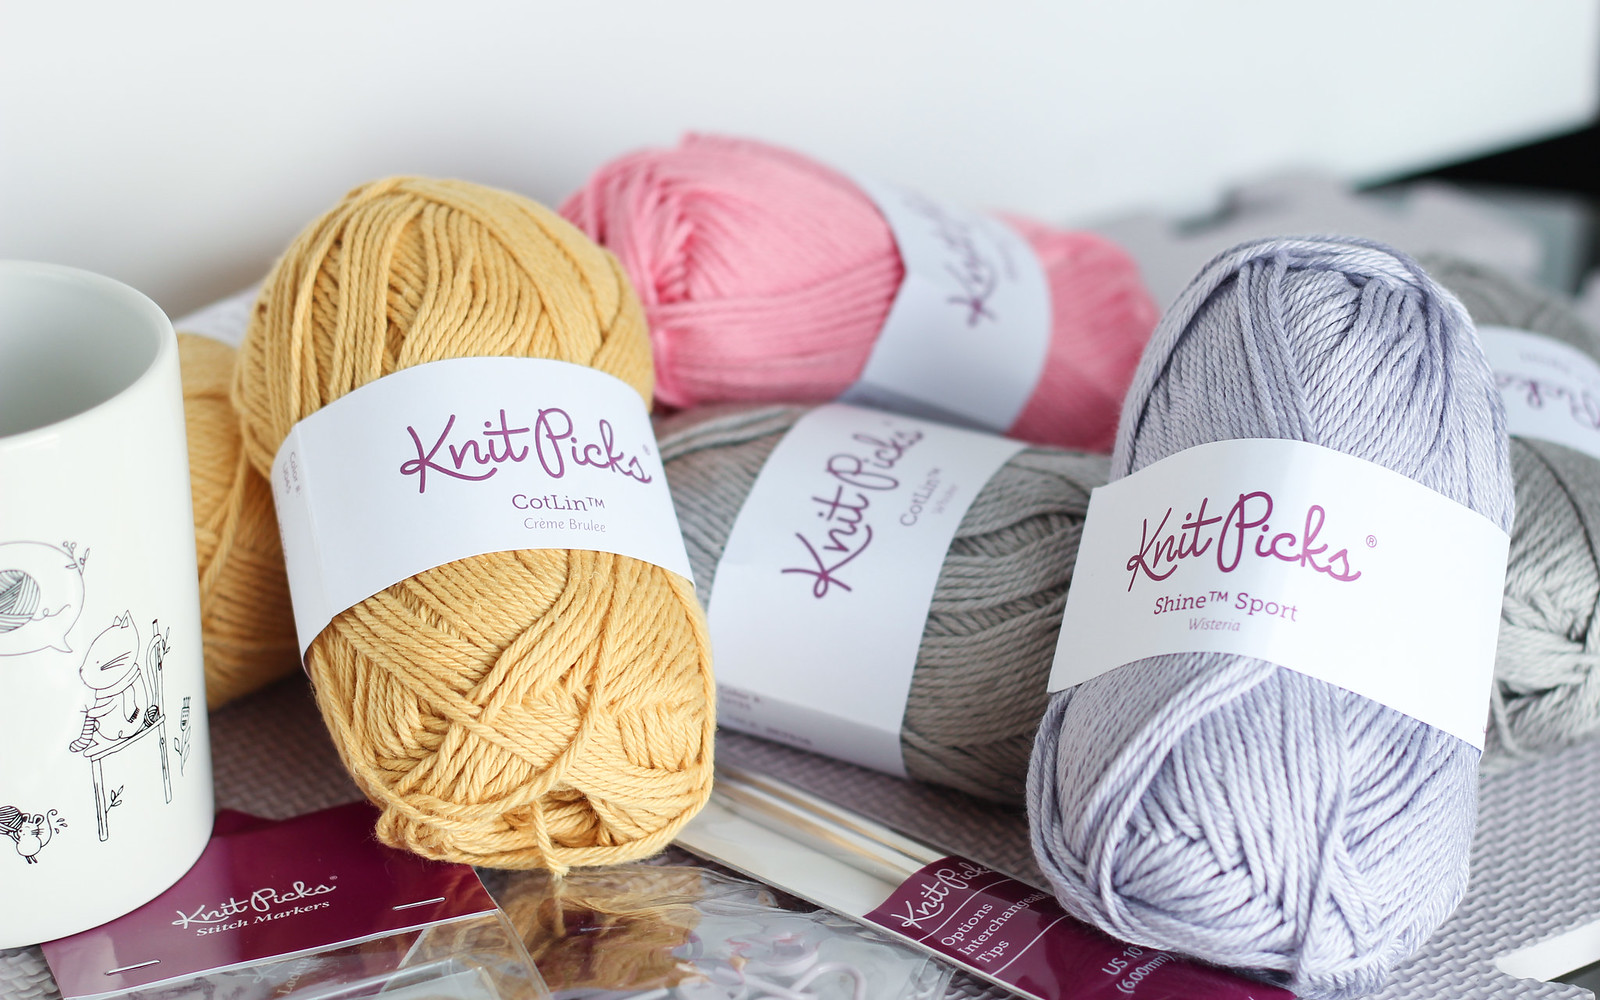
Yarn crafters can have favorites. Or maybe it's just me. I tend to get attached to certain things, including yarns. So when one of my longtime favorite yarns from Caron got discontinued, I was pretty devastated. The yarn I was pining over had an amazing luster and feel to it. But most importantly, it had natural fiber that I wasn't allergic too. Finding a new substitute became somewhat an important task. I knew I had to venture out to yarn world which I was poorly aware of.

Yarn Haul from Knitpicks

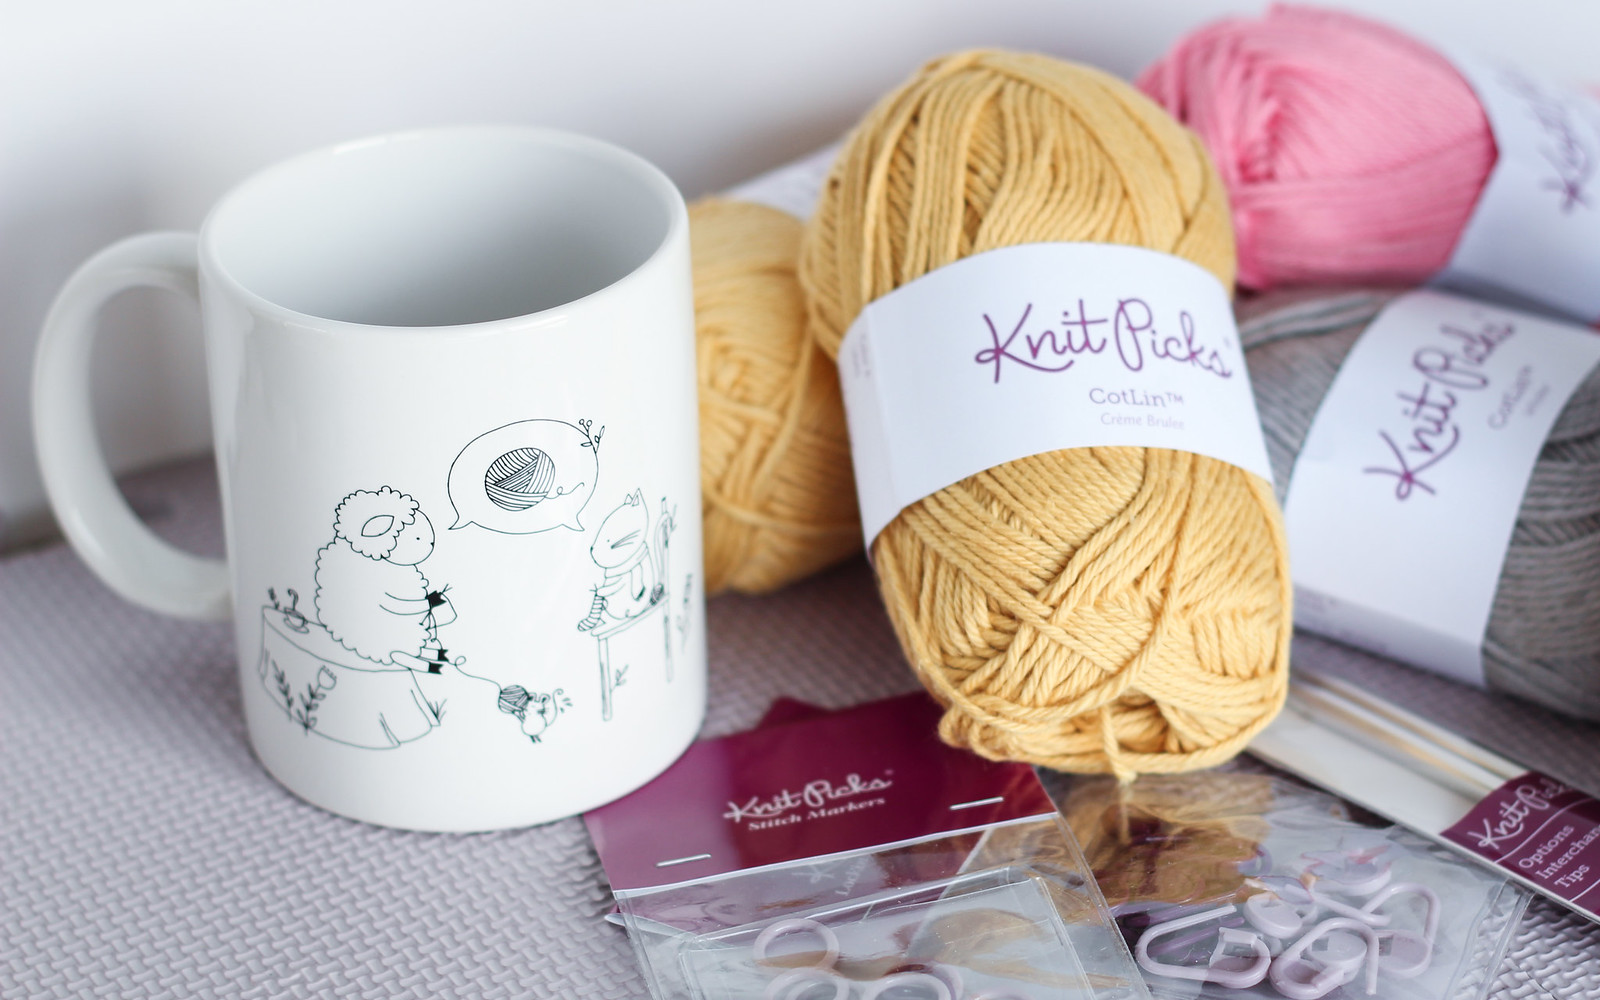
Enter, Knitpicks. A long time ago, I purchased a Yarn Ball Winder from them. I fell head over heels in love with the winder. But I've never purchased any yarn from them before (I know, it's a shame). Finally I took the plunge and ordered couple of different yarns to try out. The yarns that I ordered from them were Comfy™ Sport, Shine™ Sport and CotLin™ (DK). I am used to work with heavier yarn, mostly with worsted and light worsted variety. So it was a bit intimidating to work with thinner material. But I have to say, eventually I became a fan. Among all of these, Comfy™ has to be my favorite. It’s a combination of acrylic and cotton, so no chance of allergy for me. The good news is Comfy™ also comes in worsted weight. I can’t wait to try it out in the future!

Yarn love mug Sheep and Kitten from Knitpicks

Now can we all discuss how cute this mug is?

(Knitpicks did not pay me to write this post. All of the yarns, and other stuff in the pictures are purchased by me.)

November 19, 2014

WIP Wednesday: Bias Knit Blanket

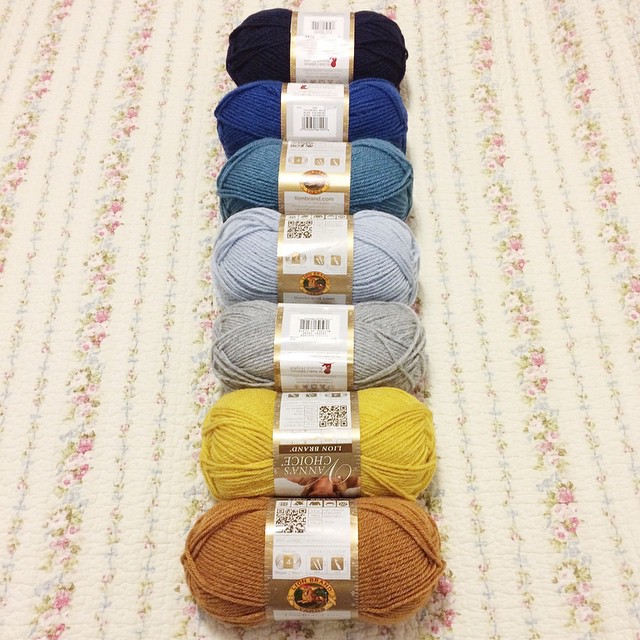
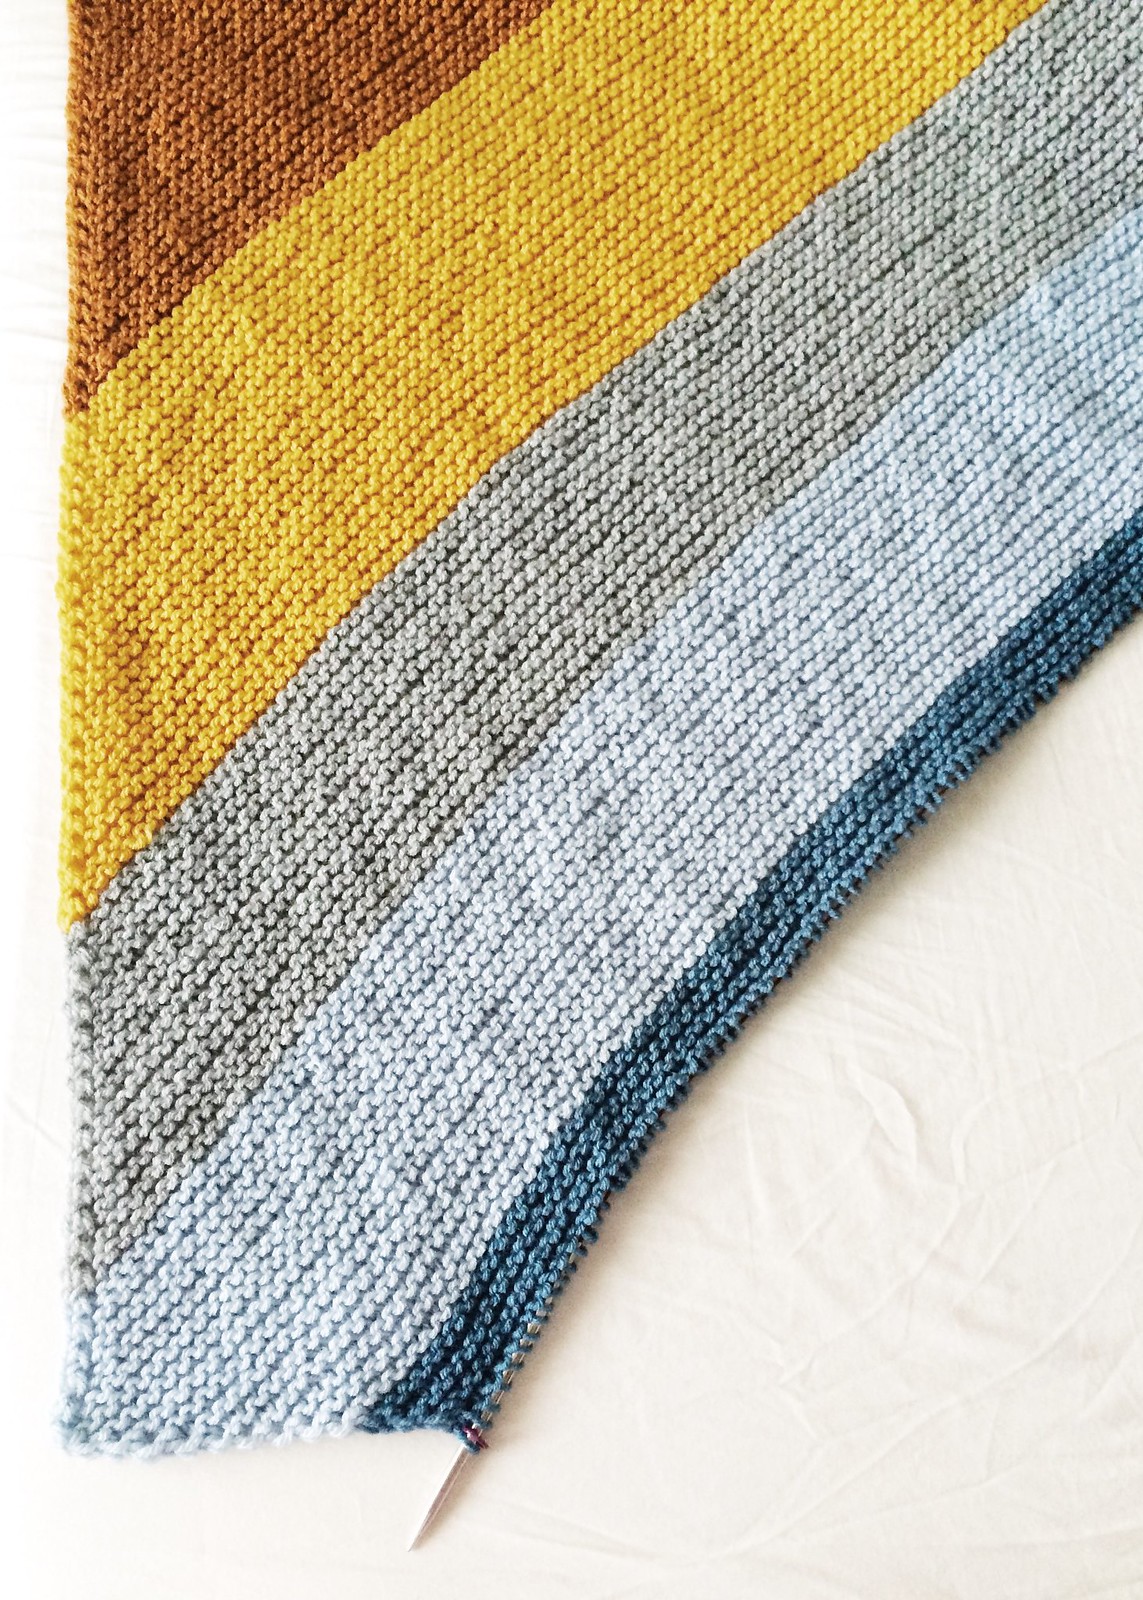
In this corner of the world, winter has come with it's full glory of snow and freezing temperatures. Brr... This weather always makes me want to curl up under a cozy blanket, drink tea and make all the yarn-y things in the world. This is the time of year when I stock up on new yarn and bust out my old stash to make a hat or two for dear friends. Lately, I've been swooning over all things knit. I need much practice in the knitting department. So when I picked these yarn from Michaels', I decided to make a knit lap blanket.

yarn haul michaels

I just wanted to quickly show you how far I've gotten. I have two more skeins to go through. So far, I am quite pleased with how this is turning out. Come to think of it, this is actually my very first big knitting project. So, yay! I plan to write a more thorough post (what yarn did I use, what pattern I am following, etc.) when I am done with this blanket.

WIP: Bias Knit Blanket

I almost always post a glimpse of my work in progress(es) on Instagram. So don't forget to follow me there. ●‿●

October 30, 2014

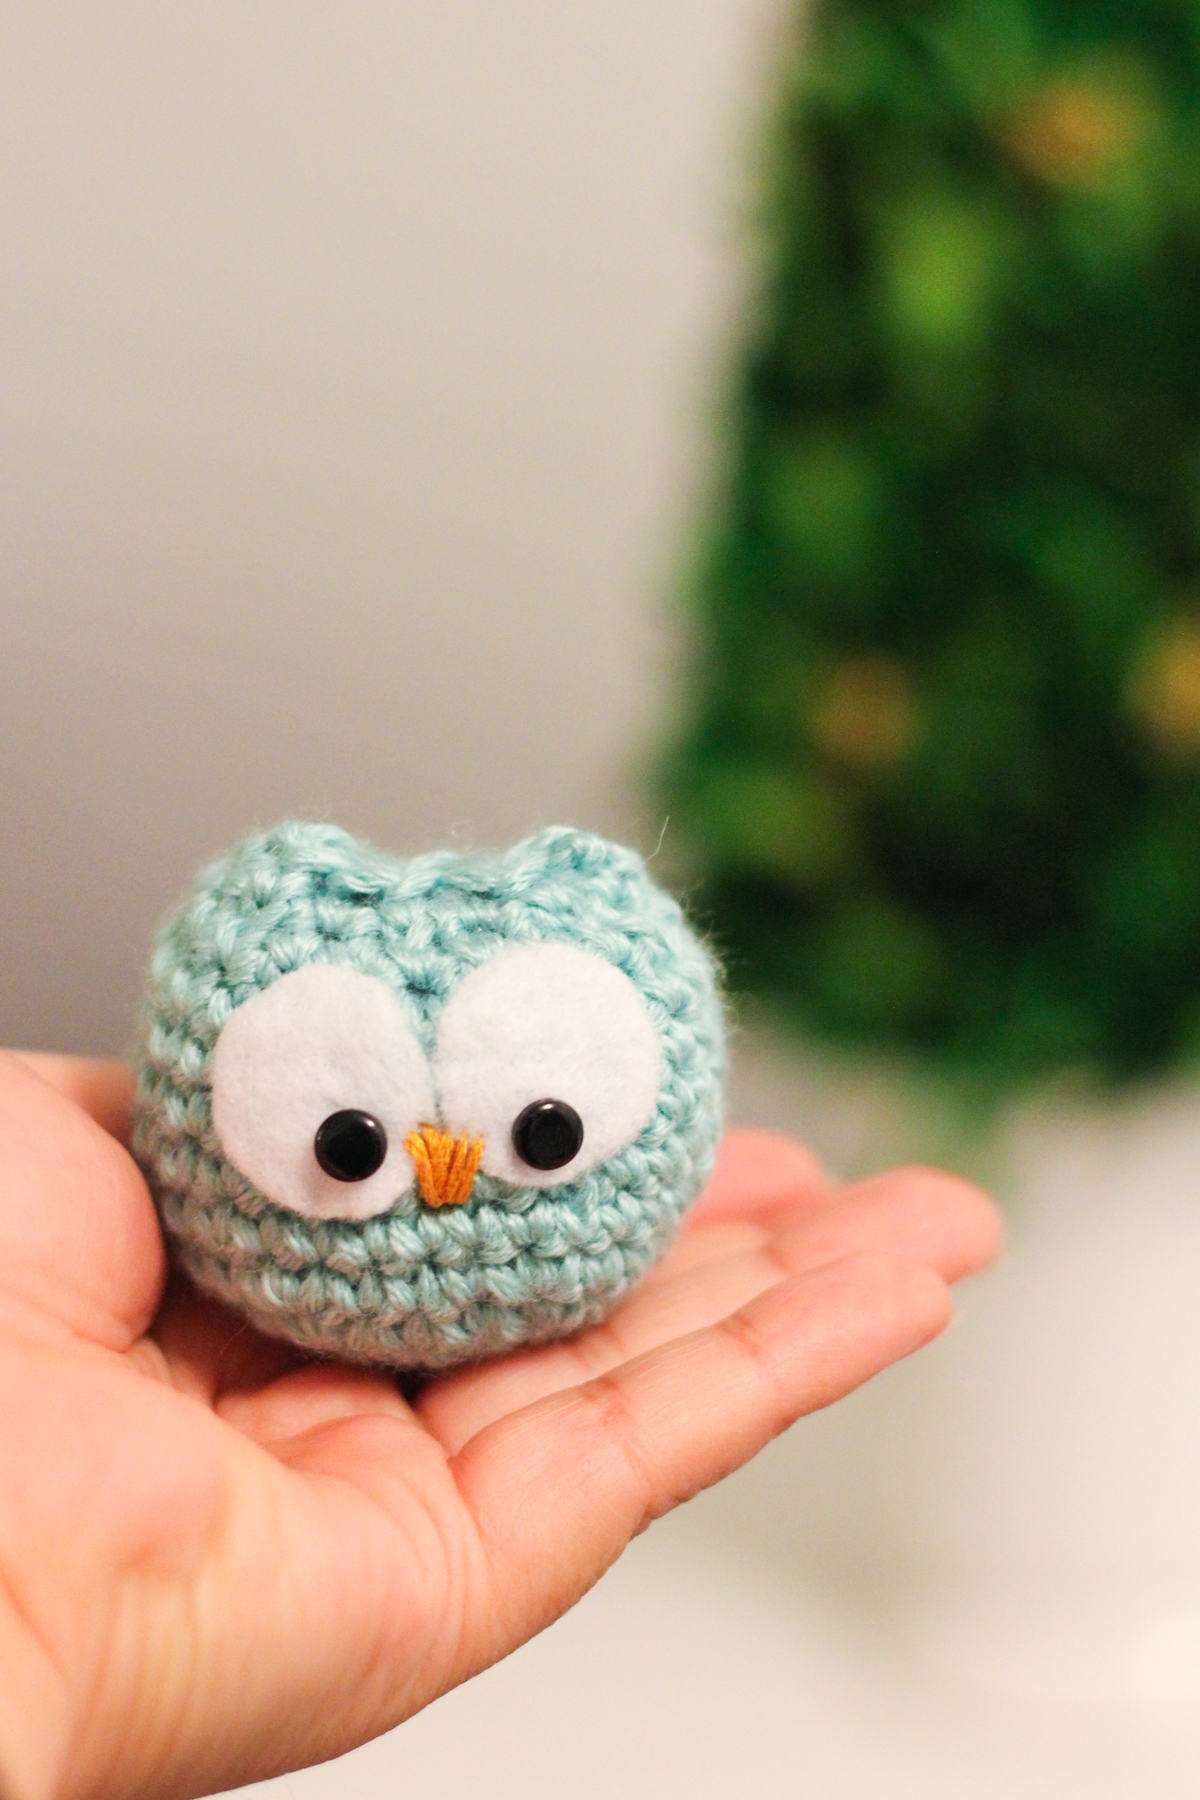
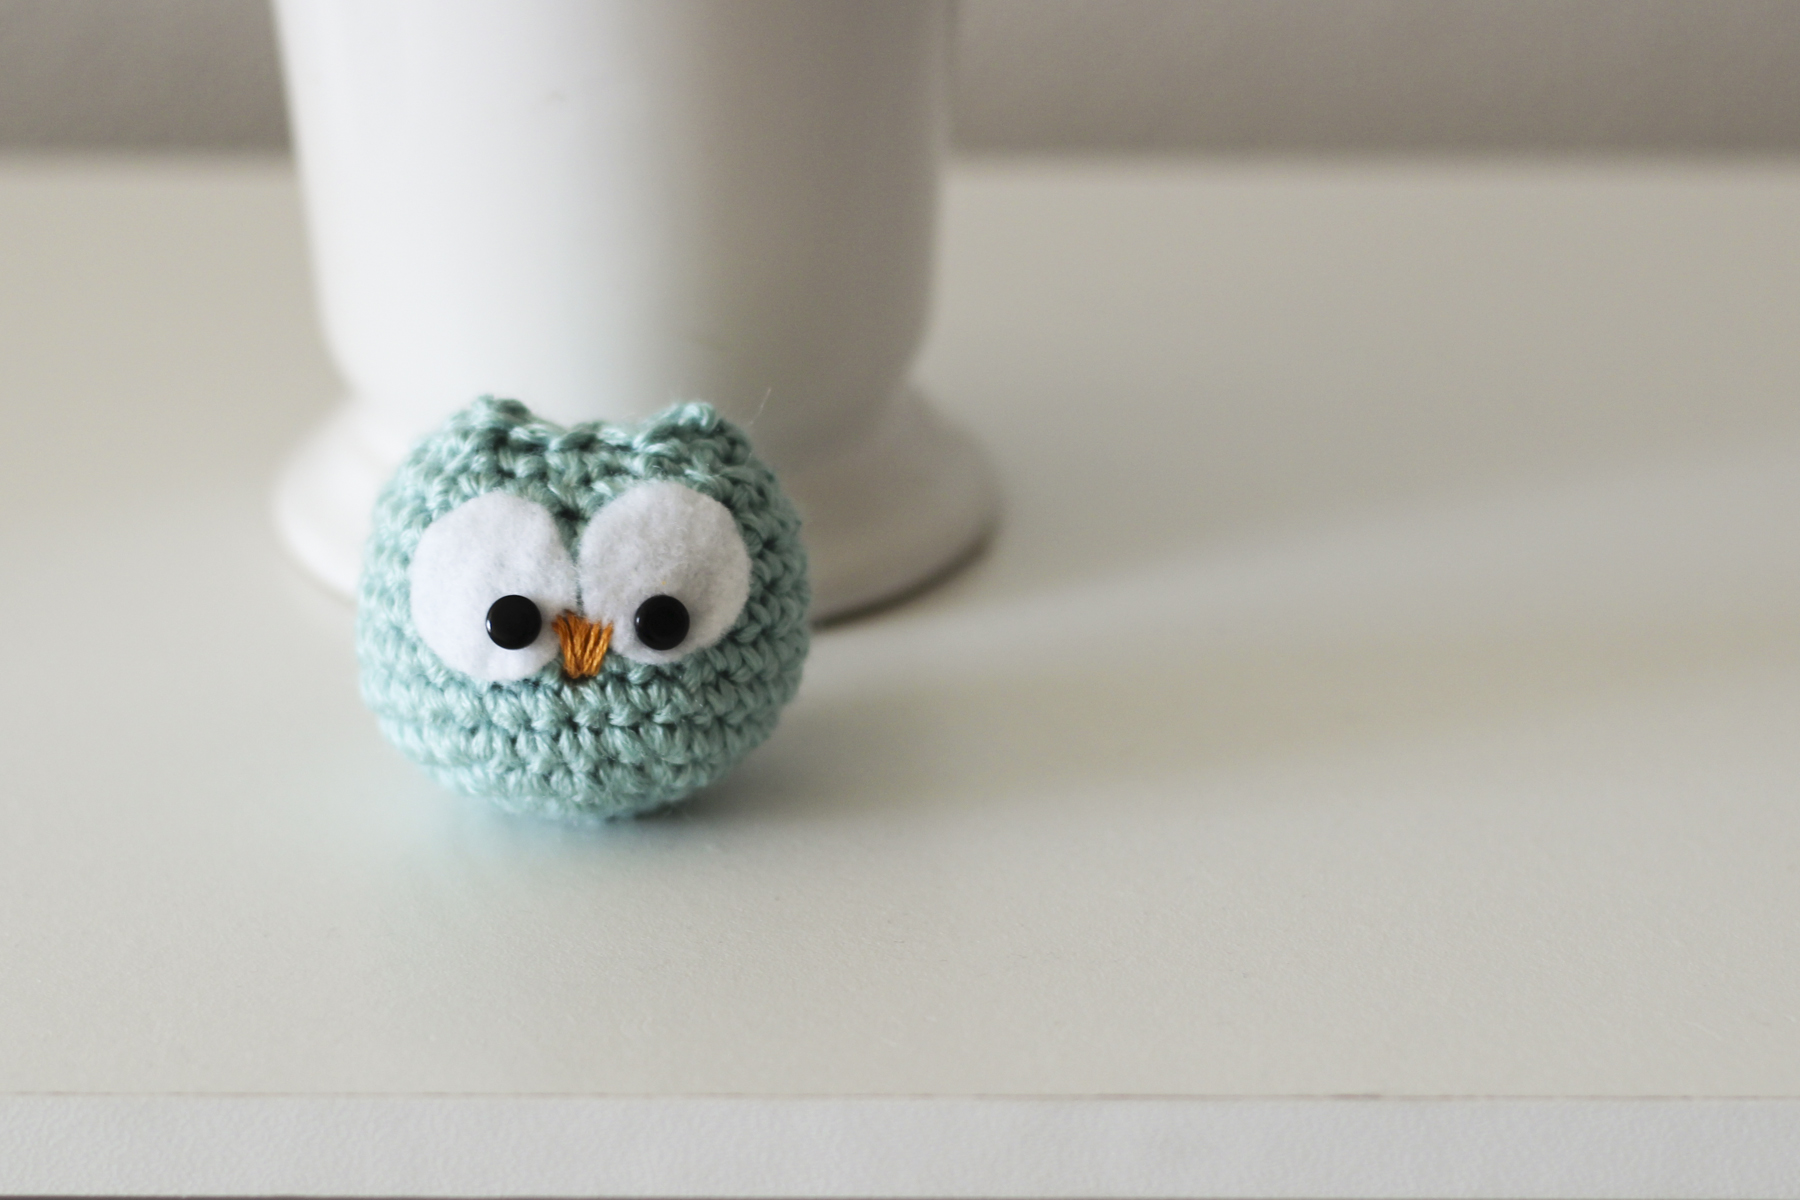
Baby Owl Amigurumi

Sometimes I feel a bit sorry that I don't make enough amigurumis. Crochet has always been my favorite way to unwind, but making amigurumis can feel a bit overwhelming and mentally taxing. So it's been a while I made one. Recently, I wanted to make something for a friend, C. And I was looking for something cute yet simple. After a while, I found this baby owl amigurumi pattern over at Ravelry by Josephine of A Morning Cup of Jo Creations.

Baby Owl Amigurumi

It turned out to be absolutely adorable! I used a little bit of my favorite yarn (Caron Country - which is, sadly, discontinued) and an hour and a half later it was done! And half of it was spent attaching the eyes, because I didn't have fabric glue or safety back eyes. I used the same black buttons that I used on my owl Kindle cozy. Yes, I hand sewed these parts. but it didn't bother me for a bit.

Baby Owl Amigurumi

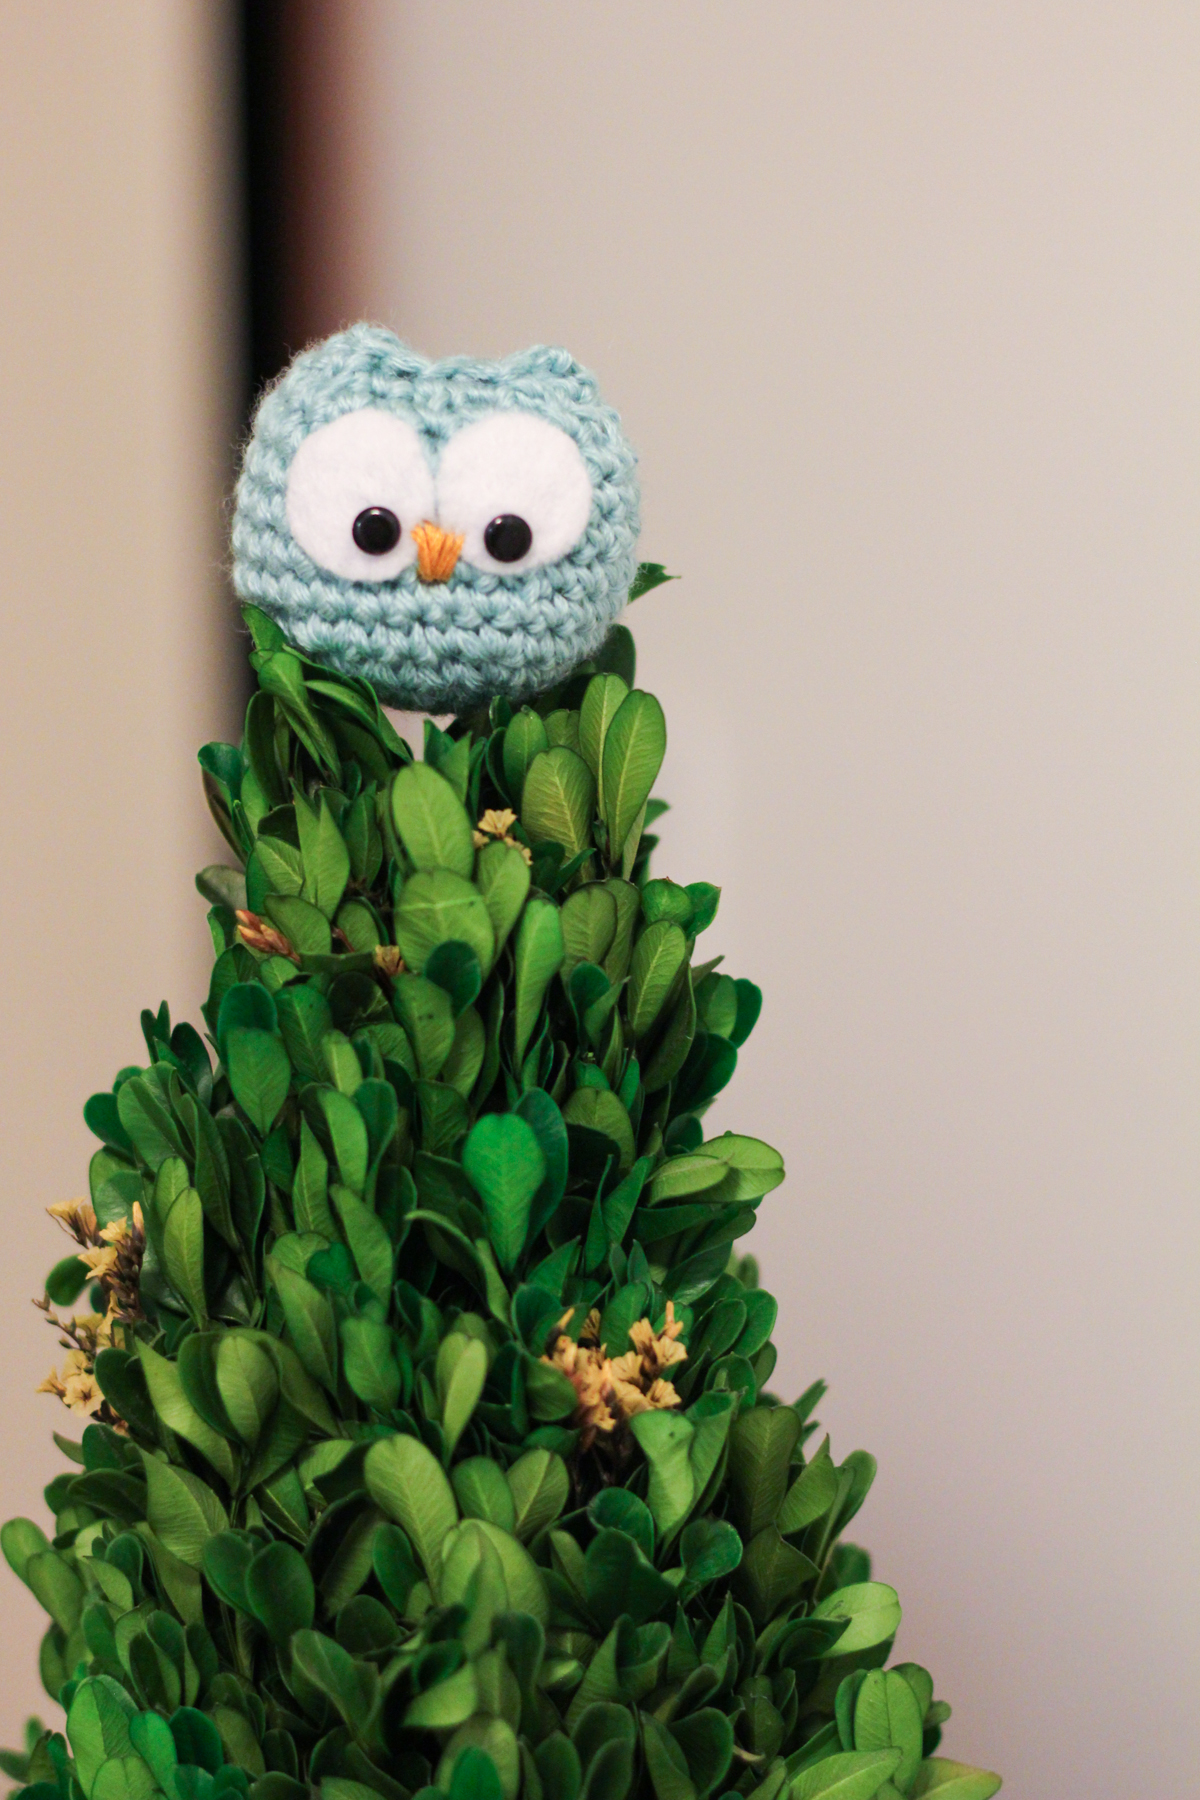
Instead of making it an ornament, I attached with some key chain parts that I found in Joann. Too bad he had to fly all the way to Arizona later that day, so I don't have a picture with the key-chain on. But I tell you this, he was pretty tree-topper  . Now I wanna make this guy in all the possible colors.

Baby Owl Amigurumi

Do you make amigurumis? Do you have any favorite pattern? Do share!

August 27, 2014

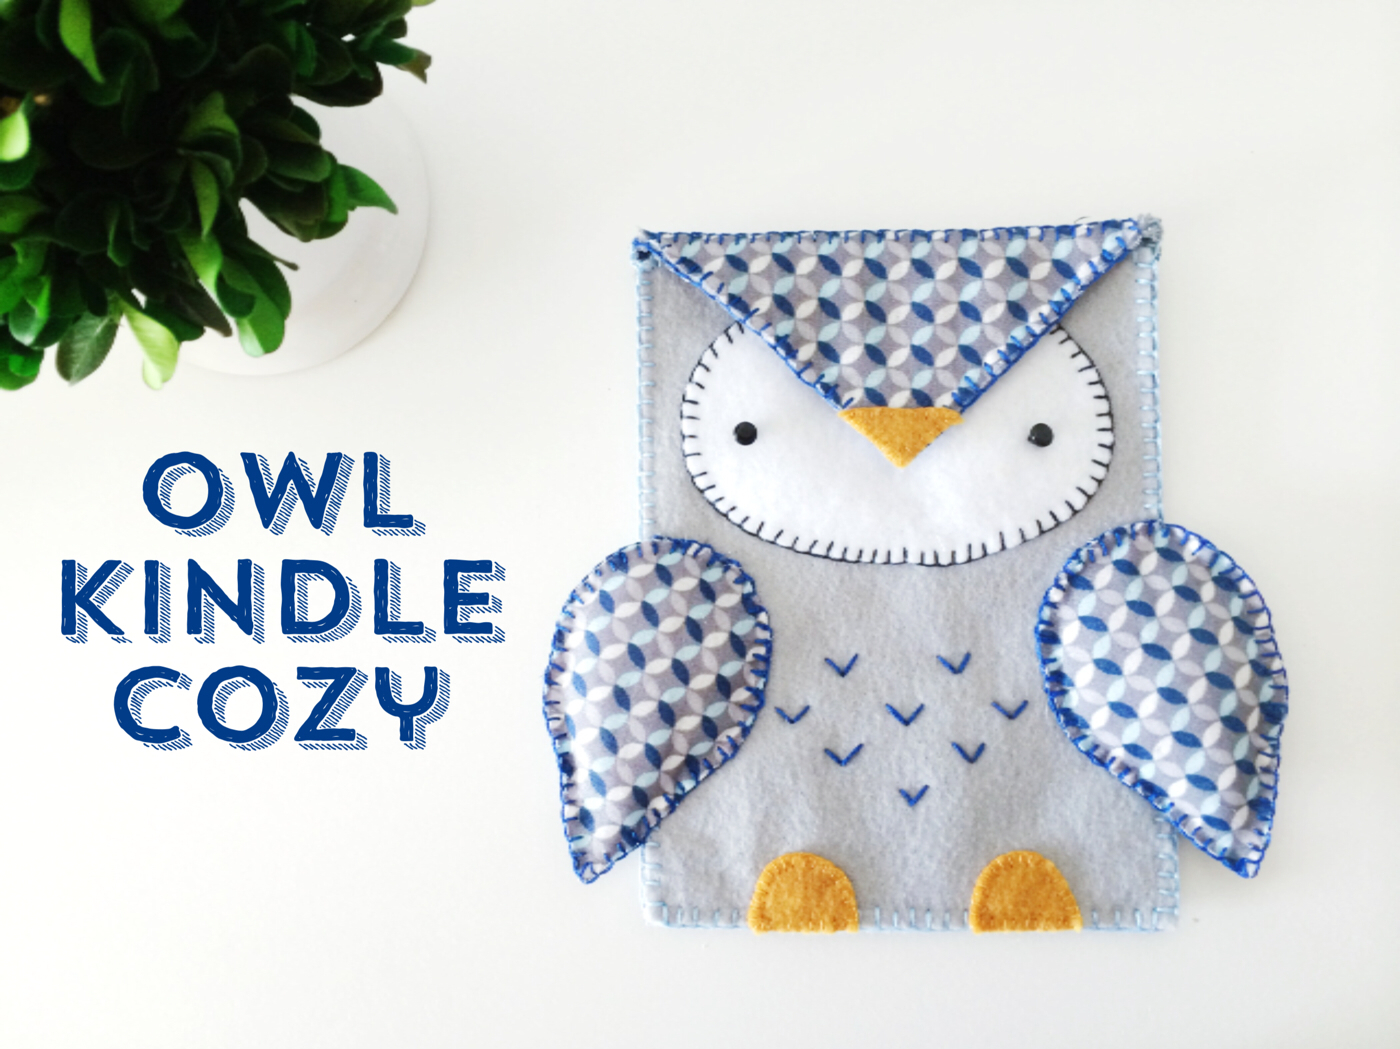
Owl Kindle Cozy

Writing a craft blog can be overwhelming at times. Specially if you're like me and have an unhealthy amount of expectation towards yourself to churn out new, interesting and fun posts/projects. In my mind, I have this notion that I can only write posts whenever I create something or feel particularly creative. Now I haven't felt like that in a very long time. Then, a few weeks ago, we moved to our new apartment across town and there is this Joann store about 5 minutes walk away. As I browse for inspiration among all fabric and other knick-knacks, my creativity, once again, peeks through all the gloominess I have been harboring for the last couple of months. So, I sat myself down again, sketch some random thingies and come up with this simple kindle cozy.

Owl Kindle Cozy

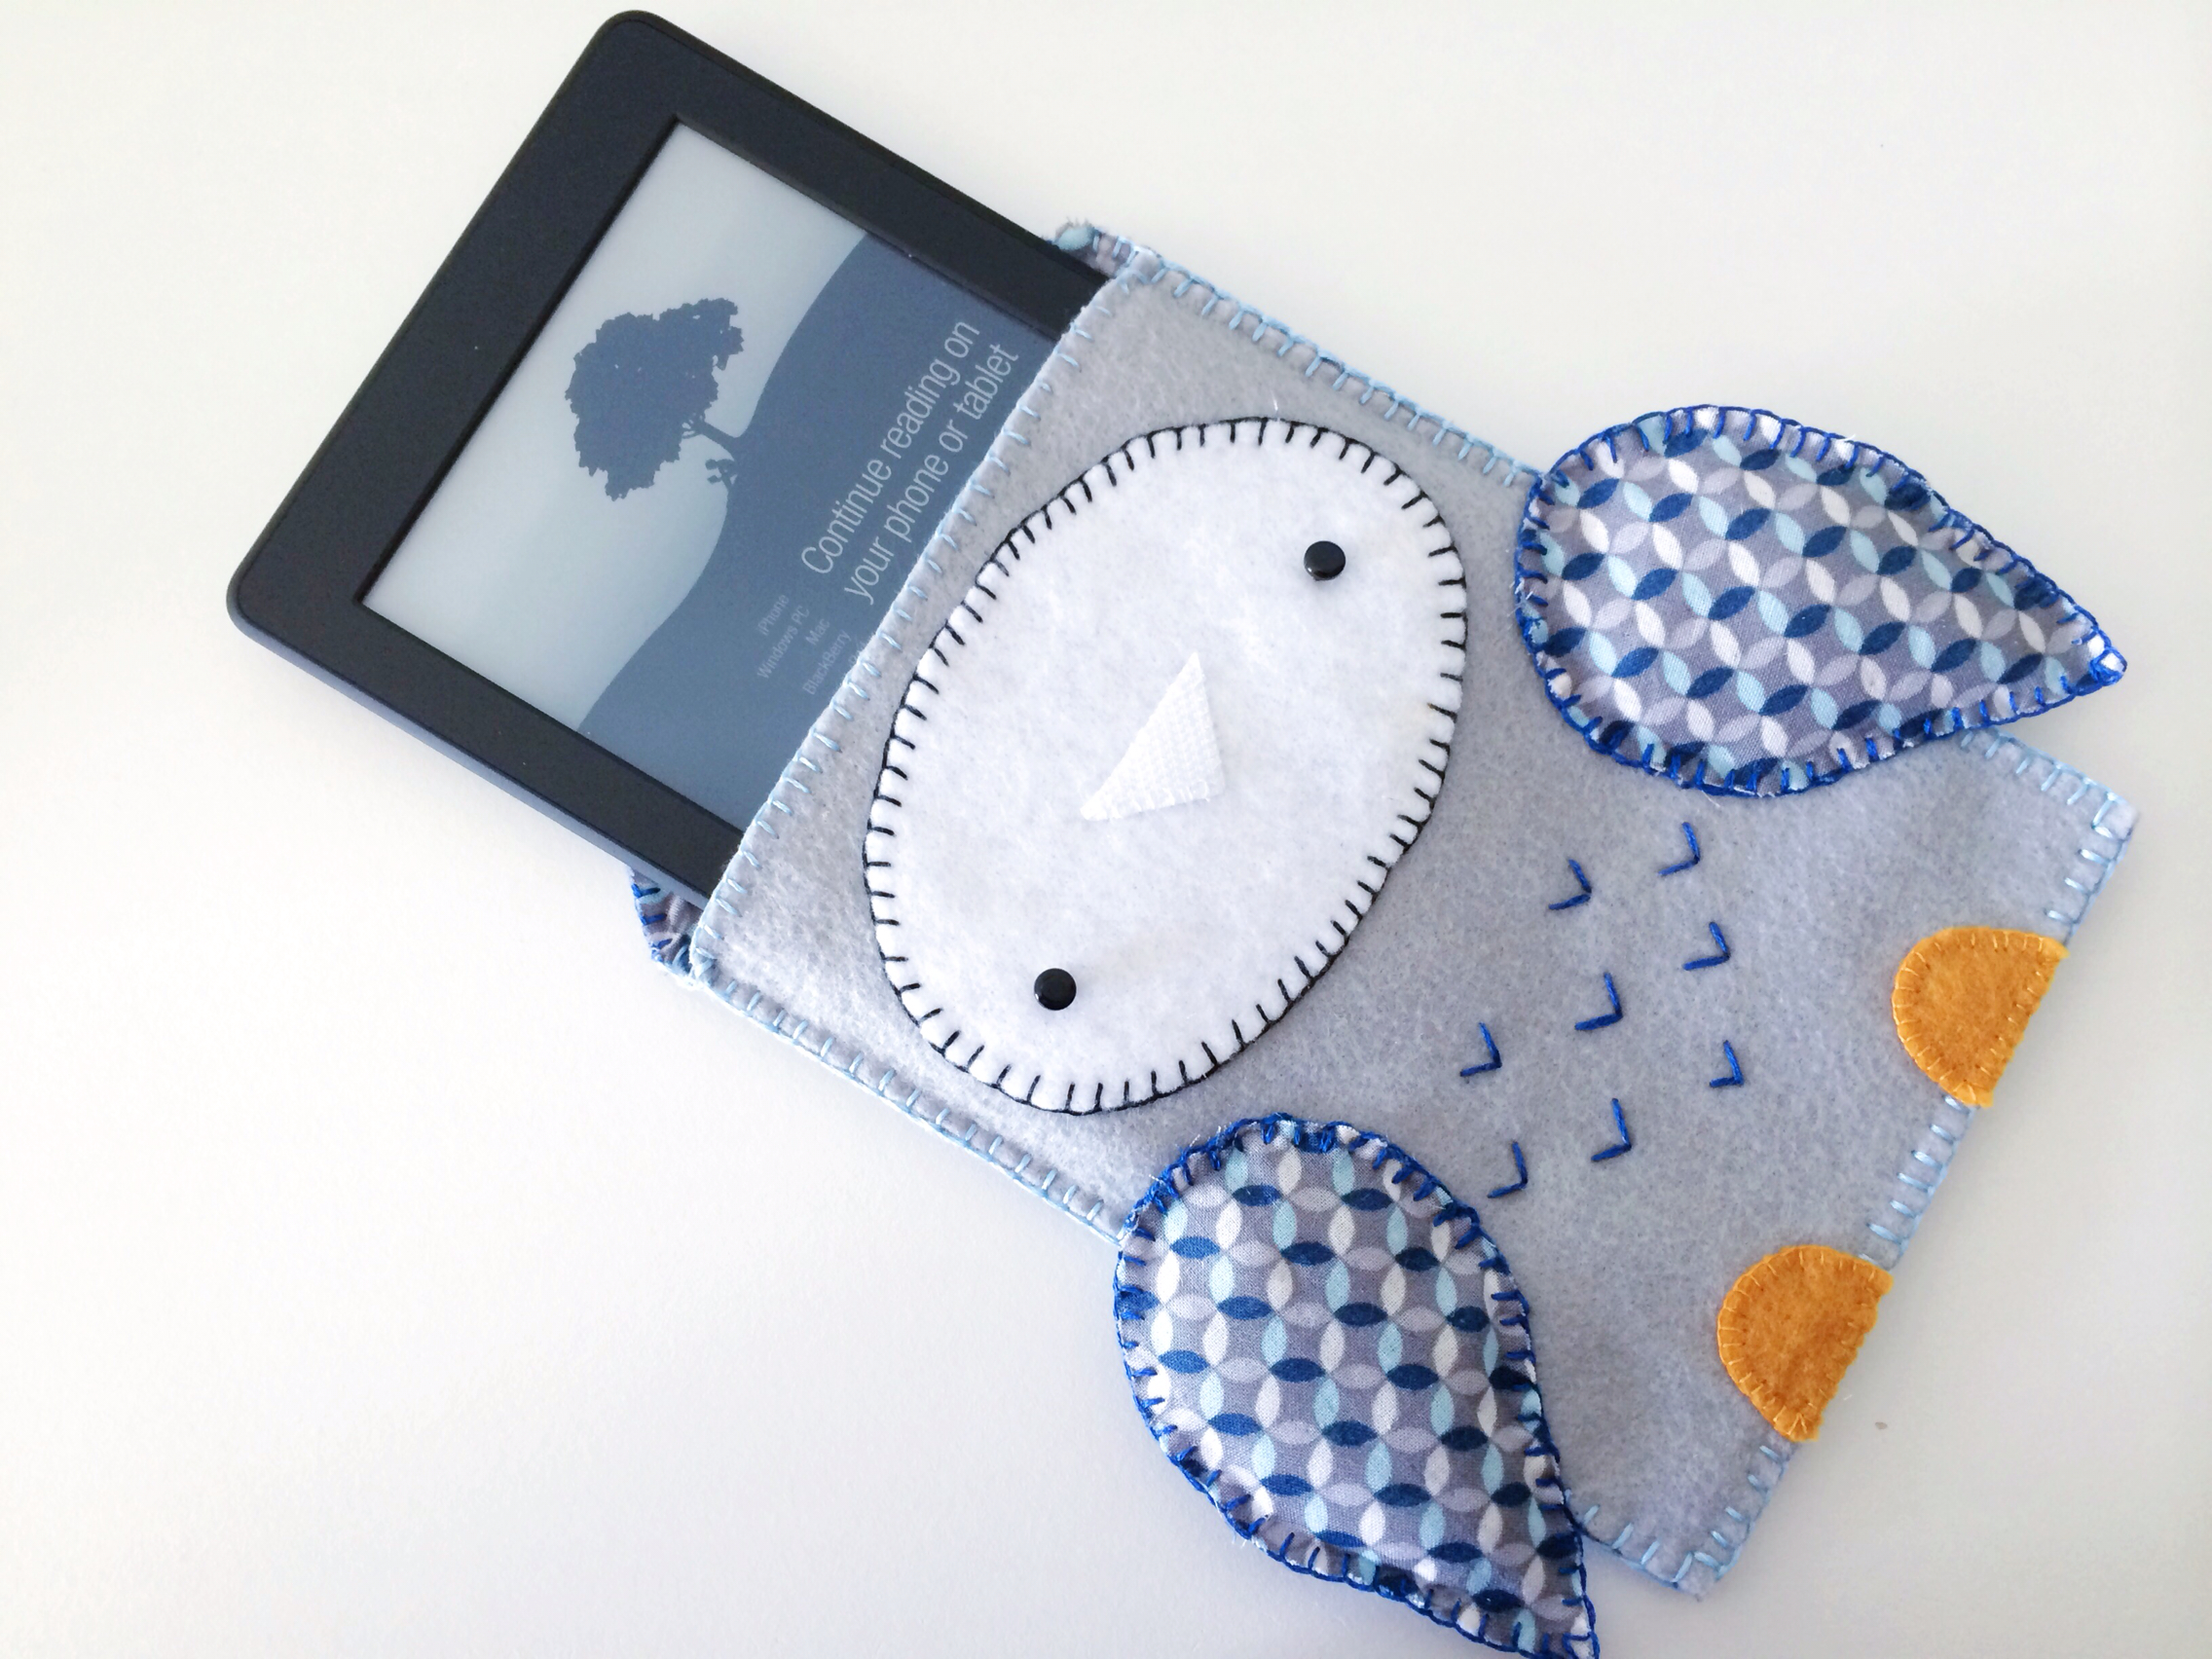
Did I ever tell you guys how much I love my Kindle? No? Well, I do. Very much. It's a Kindle Paperwhite (the old version, not the new one). Paper books will always be my first love, but this comes to a very close second. It's lightweight and super portable. I have had it for a while. But it started to get a bit banged up. So I thought - why not make a cozy for it?

Owl Kindle Cozy

Owl Kindle Cozy

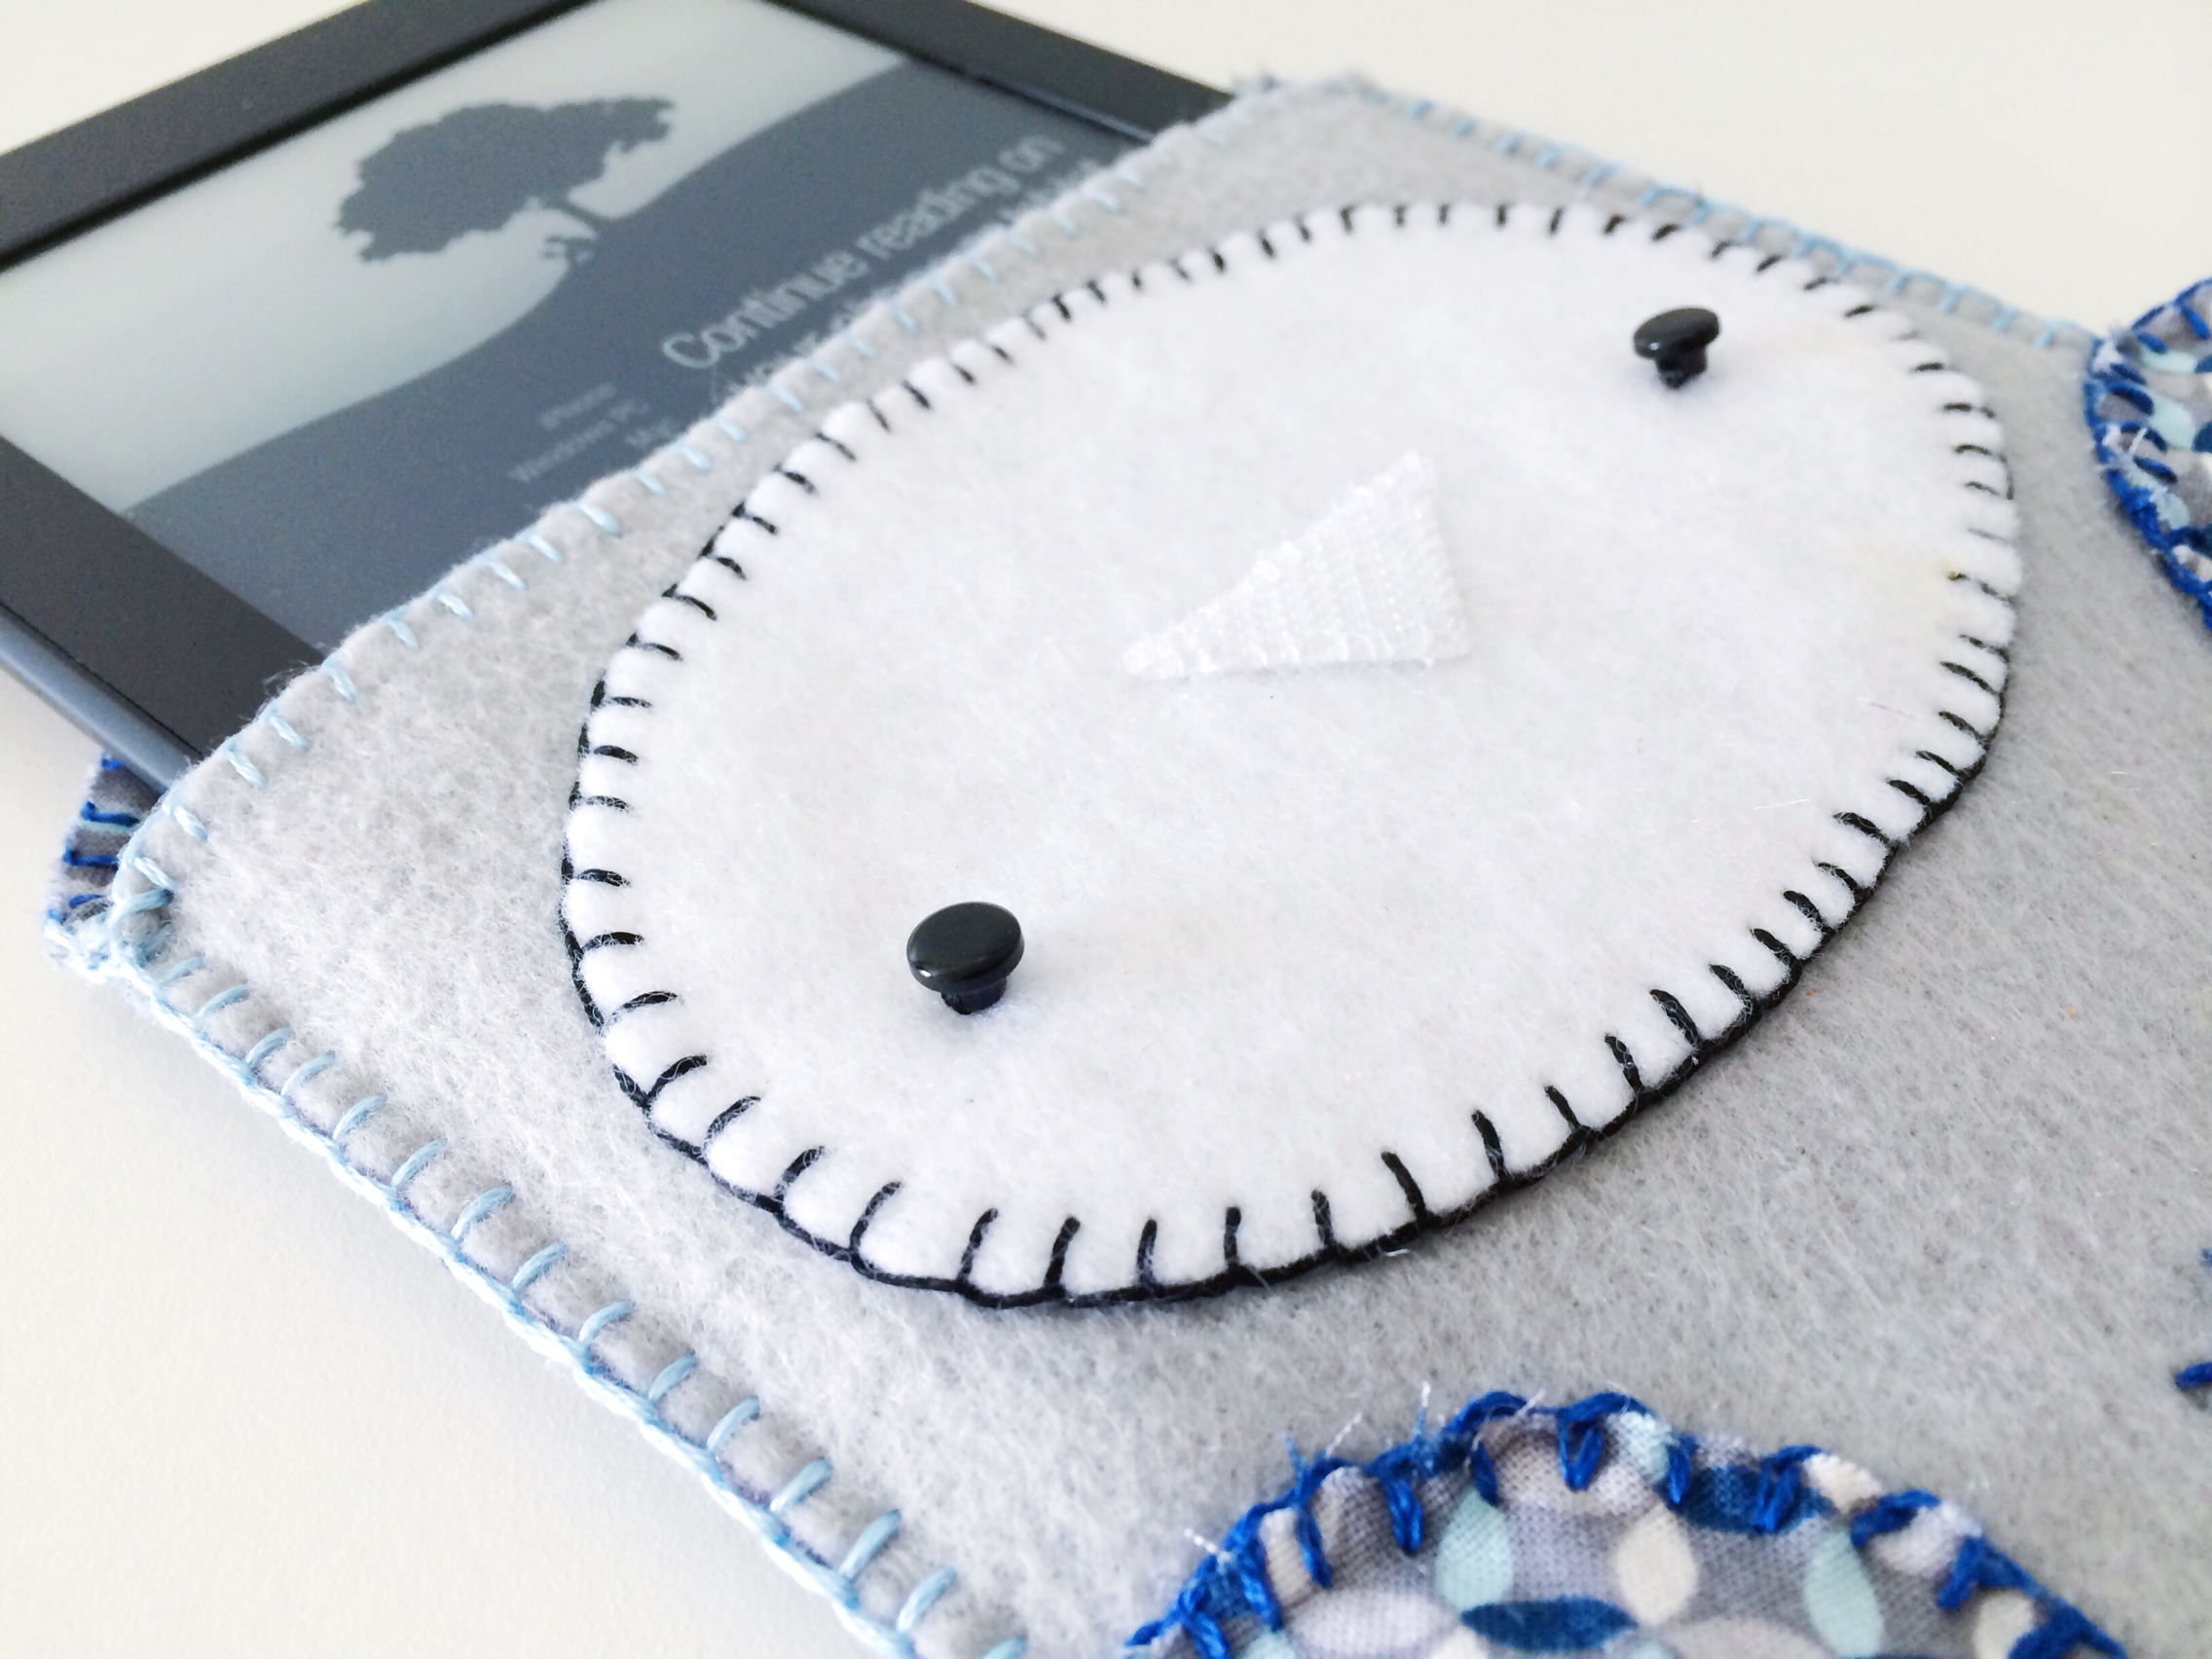
I decided on an owl, cause they are my absolute favorite! Some Pinterest browsing later, I came up with a sketch. I did give it a bit amigurumi-esque features. The body is made mostly of different colored felts. I used a pretty patterned fabric to line it and add a bit more interest. For the wings, I lightly stuffed them with poly-fill to give them a more of a cartoonish 3D look. The eyes were couple of 1/4 inch buttons. Finally to keep the flap (forehead & beak) closed, I used some sew-on velcro. Word of the wise, use the stick on velcro instead. It was a nightmare to sew on the velcro with a needle. All in all, I loved how the cozy turned out to be. It's a perfect fit for my Kindle and quite cute (don't mind me if I say so myself :P).

Owl Kindle Cozy

So what do you think of it? If you want to make a similar one, let me know. I will post a pattern with measurements and perhaps a how to post. Have a crafty day!

January 15, 2014

Hats and more hats

One of my very favorite things to crochet is hat. It requires minimal amount of time, effort and yarn. Most of the hats I have made only required one ball of yarn. And they are great gifts. I don't know about you, but the Guy only wears hats in winter. He's one of those people who get their winter jackets out at the last minute. He doesn't care much about gloves or scarves. The reason is quite a mystery- it's either his manly men psyche or he's actually rather hot (har). So every winter I make him hats, loads of hats.

The thing is there are not so much interesting crochet hat patterns out there. There are hundreds of beanie hats, but beyond that, not much. Knitted hats on the other hand are beautiful and in lots of varieties. Being a noob in the knitting trade, I'm somehow terrified about joining in rounds and decreases and such. Then again, you cannot just NOT do something because you are terrified. (Just don't encourage me to pet a cockroach; I might faint). So I knitted one in round too.

Here are a couple of my favorite hats I made for the Guy so far. #1 and #2 are essentially the same pattern. The only difference between these two are the placement of the single crochets. The pattern is my absolute favorite! I have made couple of few hats for gifts and got lots of compliments. You can find the pattern here through Ravelry.

Hat #1

Hat #2

The next one is a knitted hat. The pattern was found in Lion Brand's website. It's a fairly easy knit pattern. I love the colors I used instead of the original. The Guy was excited, because it turned out to be a very soft hat.

Hat #3

After reading a very good article on basics of making hats in rounds in Crochet Accessories Magazine, I've decided to make my own hats. And the next one was the fruit of that labor. I love the subtle ribbing textures in diamond patterns. I'm very proud of this pattern. And the Guy is in absolute love too!

Hat #4

Do you like winter hats? Or do you like making them for loved one? Do you feel like you'd want to make one of these in the future? Let me know in the comments below. I love reading your comments!

August 27, 2013

Granny Square Lap Blanket

There is something about granny squares that always made me cringe. I never attempted to make anything with these, no matter how pretty they looked on someone else's blog/book. Maybe I had some sort of self doubt about not being able to pick a great color combination. Or something like that. So I pushed granny squares in the deepest corner on my mind.

Then one day, I wanted to a make a blanket. Something to cuddle in; with a good book and a cup of my favorite tea. And then I thought, 'you know everyone should have a granny blanket, no matter how square they look.' I know, silly. So I started to make this. I had some white yarn already. To keep it neutral, I picked some grey yarn from the same family. Funny thing is both of them were from Bernat Softee Baby line (I used white and flannel). So basically I was making a baby blanket. :)

Granny Square Lap Blanket

Granny Square Lap Blanket
After 5 balls of yarn and many Star Trek episodes later, I finally finished it! The finished product ended up being 44 inch by 44 inch. It's a good size for either a lap blanket or a baby blanket. Using baby yarn (is that a thing?) made it very soft and comfortable for cuddle sessions. If you want to make the exact same blanket, let me know, I'll post the pattern.

Granny Square Lap Blanket
What new crafty decisions have you adopted lately? 

August 9, 2013

Cross Stitch: Peony

[ After a much needed blog break (sorry for not announcing before), I am resurfacing in the blogging scene little by little. Posts will be a bit scarce as my crafting projects are getting finished very slowly. As summer ends in a month or so, I'm sure I'll find plenty of opportunity to play with crochet hooks again.]

One of my very fond memories of my mom and grandma together is doing a lot of crafts together, specially needlepoint. When I was just a kid, about 6 or 7, I picked up my first needle and did some wonky lazy daisy stitches which I was so proud of! Honestly, I wasn't much of a embroiderer (I'm not even sure if that's a word). Then couple of years later I stumbled into the world of cross stitch. And I was completely mesmerized by the technique, how a grand scenery comes to life as you count and do some silly little stitches. I was so hooked into the craft, I'd urge my mom to start a new project as soon as we finished one. With her help I finished couple of pictures (mostly floral), which I gifted to family and friends. It was such a thrill!

In recent years cross stitch has become a new hobby. A year ago I finished my first solo cross stitch project. I was so excited to see the finished product, I immediately went out and bought another one. It was a much smaller project. And I thought I could finish it in no time. Well... I was wrong. In the midst of all chaos, I abandoned the project for a while to work on something else. Although it might just have a bit ADD. I cannot seem to focus just one thing (^ v ^) . Recently I picked up it again and worked on it religiously every day. And took pictures along the way.
Peony Collage
And lo and behold, here's the finished product. Nice, eh?

Peony

The cross stitch kit is from Dimensions, called Peony. I am kinda in love with this piece. So it is hanging out in my living room right now.

Peony

Here's the picture from another angle. See how the stamens look a bit 3D?

Peony: closeup

Do any of you do cross stitch? And have a blog? Please do link up in the comments below. In the meantime, have a great weekend!

January 24, 2013

Diagonal Puffy Striped Cowl: Pattern

Diagonal Puffy Striped Cowl: Pattern

This cowl is worked in rounds. So placing the bobble stitches become a bit tricky to create the diagonal pattern. I have included pictures for clarification. The blue arrows represent the bobble stitch and the black ones single crochet. Also, note that the cowl is made while facing the right side and never turning. The made bobbles will puff up on the wrong side of the work. Using your fingertip or the eraser side of a pencil, push the bobbles to puff them up on the right side. Do this every time you finish an odd numbered round. This will make it easier to work the even numbered rounds. If you run into problems while creating this, please let me know. I will be more than happy to help.

The Material
  • 2 skeins (102 yd each) light weight yarn (wt #3) - I used Patons® Silk Bamboo in Orchid
  • a size 7 (4.50 mm) crochet hook (you could also use a size 'G' - 4.25 mm hook; the finished size will be a little bit smaller and narrower)
  • tapestry needle
Finished size
Approximately 28 inch in circumference and 5.5 inch in width
Gauge
1 bobble & 4 sc = 1.25 inch

Bobble Stitch
[Yarn over, insert hook in stitch, yarn over and draw up a loop, yarn over and draw through first 2 lops on hook] 4 times all in same stitch, yarn over and draw through all 5 loops on hook

Begin
Loosely chain 110 ( or any multiple of 5). Carefully join by making a slip stitch into the first chain; make sure the chain is not twisted.
Foundation / Edge Round: Ch 3 (counts as first dc), * 1 dc into next st; repeat from * to the end. sl st in the 3rd ch to join. (110 dc)
Round 1: ch 1, * work bobble st on the first st, 1 sc in each of next 4 sts; repeat from * to the end. sl st to the top of the first bobble or ch 1 to join. (22 bobble sts)
The first bobble stitch will be on the same stitch, 3rd ch, you joined the previous round at.
Round 1

Round 2: ch 1, * 1 sc into next st; repeat from * to the end. sl st to the first sc to join. (110 sc)
Round 3: ch 1, 1 sc into next st, 1 bobble into next st, * 1 sc in each of next 4 sts, 1 bobble in the next st; repeat from * to the end. 1 sc in each of last 3 sts. sl st to the first sc to join.
Round 3

Round 4: repeat Round 2.
Round 5: ch 1, 1 sc into each of next 2 sts, 1 bobble into next st, * 1 sc in each of next 4 sts, 1 bobble in the next st; repeat from * to the end. 1 sc in each of last 2 sts. sl st to the first sc to join.
Round 5

Round 6: repeat Round 2.
Round 7: ch 1, 1 sc into each of next 3 sts, 1 bobble into next st, * 1 sc in each of next 4 sts, 1 bobble in the next st; repeat from * to the end. 1 sc in the last st. sl st to the first sc to join.
Round 7

Round 8: repeat Round 2.
Round 9: ch 1, * 1 sc in each of next 4 sts, 1 bobble in the next st; repeat from * to the end. 1 sc in the last st. sl st to the first sc to join.
Round 9

Round 10: repeat Round 2.
Repeat rounds 1 - 10 until desired width is achieved.

Last round: Repeat foundation round once. Fasten off.

All done!!

Diagonal Puffy Striped Cowl

January 15, 2013

On Toys and Tools

I have always been a bit frugal and creative in much of my crafting endeavors. So when I fell in love with working from a center pulled yarn ball, naturally I watched many YouTube videos to do it myself. By hand. It was going very well. Until I started a project that required five different colored yarns. At first, I was like "Yeah bring it on!". Then it turned into "it can be very relaxing to wind yarn by hand. Om..." . After all that, my turnover rate was one yarn ball per day. At that point I realized something has to be done, which most likely involves me purchasing a yarn ball winder. So I gave in and I got one from Knit Picks.

Yarn Ball Winder

And let me tell you something... this was the best $20 investment I have made in my entire life. It is a great tool that produces these fabulous center pulled yarn balls that doesn't roll around. After I set it up for the first time, I wound 7 - 8 skeins in an hour and half. I was really, really impressed.

yarn ball winder: montage
Speaking of tools, some time ago I purchased a No.7 crochet hook. The only one I found was from Tulip. Although it is a little expensive than your regular Boye hook (which I have been using solely until then), it is a charm to work with it. I can not say enough good things about this particular hook! So, I put it on my wish list to purchase it someday when I am an expert in crochet (he he). But my lovely hubby totally surprised me this Christmas by getting the entire set! And I am so in love with them!!

Tulip Crochet Hooks

Do you have any particular craft tool that you can not do without? I would love to hear about it!

Disclaimer: Knit Picks and Tulip did not pay me to say anything for their products. These are my personal opinion on things I have purchased myself or received as gifts.  

January 11, 2013

Diagonal Puffy Striped Cowl

I have been wanting to make a cowl for sometime now. After all, it is winter and cowls seems to be the popular choice of the season. But after two failed attempts I wasn't quite sure anymore. You see, I had this lovely plum yarn. The color itself is very lovely. But it doesn't go well with other colors. So I frogged my first attempt. Then I started a heavily textured pattern. And the pattern was eating up yarn like crazy. So I had to rip that one, too. And then couple of days ago, I came up with this simple pattern, which had some texture, but not too much. And... and... it took me only three days to finish it! Behold the Diagonal Striped Cowl.

Diagonal Striped Cowl

Here's me wearing it. As you can see, it is not quite thick or long. It is one of those cowls that stay close to your neck. But it is not quite tight either. It may be modified to be longer or shorter (or wider) to your desire. But I loved this length and width!

Selfie

Here's a closer look at the cowl.

Closeup #1

Err... it doesn't look quite right. How about this one? Apparently, it is a bit hard to take a self portrait while focusing on the cowl. Oh well!

Closeup #2

See? The pattern is rather simple! The staggered bobble stitches make the diagonal stripes.
Of course, you can try to figure out the pattern from this. (^_^) But I'll be posting the pattern pretty soon, I promise. Until then, happy crocheting! 

January 9, 2013

New Year

Untitled

Happy New Year!

Hi everyone! How's the new year treating you all? I've been on an impromptu blogging break the last month. Hence the lack of posts. It is mostly because my usual hobbies were replaced by some new ones momentarily. If you follow me on twitter, you probably already know I've been baking up a storm, taking silly pictures and watching way too much TV on Netflix. Although I love baking as much as I love doing crochet, I will not be sharing my baking endeavors here. This blog is still about my creative efforts on crafts and photography. Although, baking can be called creative, no?

Every new year I get tempted to make resolutions. But the problem is, no matter how well intentions I have, I end up abandoning them in a month. So this year, I did not make any personal resolution at all. It was kind of liberating to welcome the new year with an open mind instead of focusing on any particular issue. That being said, some sort of guidelines are always a good idea in some aspects of life. So here are the three resolution I would like to try this year for crafts and creativity.
  1. Create more original designs in crochet.
  2. Take more pictures.
  3. For any given time, reduce the number of WIPs (work in progress) to 5.
Also, I would love to network with more crafters, yarn enthusiasts and other bloggers (non bloggers are also welcome). Please feel free to follow me on twitter (@FarahA30), Pinterest (farabedin) and Flickr (farahn30). I am very frequent on twitter and usually share pictures of my ongoing projects and other interests. I have met wonderful people through it! May be even you!! ^_^ So don't be shy to message me there. Or you can also email me here: farah @ thefrillypages [dot] com . 

Do you have any crafting resolution for this year? Please do tell.

December 6, 2012

Seed Stitch Knotted Headband: Pattern & Tutorial

Do you remember the knitted headband I made a while ago? I finally wrote down the pattern and tutorial for it. The pattern itself is pretty simple. I used seed stitch to make the whole thing. If you are into knitting, you know seed stitch is basically, alternating knit and purl stitch.  The tutorial is very similar to the one Stephanie shares on her blog.

Seed Stitch Knotted Headband: Pattern & Tutorial

Materials

  • Some worsted weight yarn (wt #4) - I used Vanna's Choice® Yarn in Scarlet
  • Knitting Needles- US 7 (4.50mm)
  • Tapestry needle
Finished Size
Approximately 18.5 inch in circumference (or length) and 4 inch in width

Seed Stitch Pattern (for even numbered stitches)
Row 1 : *K1, P1; repeat from * to end of row.
Row 2:  *P1, K1; repeat from * to end of row.
Repeat Row 1 and Row 2 until the piece measures your desired length.

For the band, I cast on 14 sts. It ended up being 4 inch wide. Then I knitted the strip using the pattern until it goes around my head, about 18.5 inches in length.  You can shorten or lengthen at your desire. Bind off leaving a long tail.

seed stitch

large strip

Then fold it in half and sew the ends together.

fold and sew

For the ruched look of the bow, I pinched in the middle about 2.5 inch and sewed it tightly. Do it on the seam from the previous step, so the headband will look seamless later.

ruching

Next, I knitted another strip, again, in seed stitch. This time I cast on 10 sts. If you want a narrower or wider strip, reduce or increase stitches. Just remember to use even numbers for the above pattern to work. This smaller strip is our knot for the bow. You need this smaller strip to go around the ruched part; so knit until the piece measures around 4 inch.

small strip

After finishing off, wrap the smaller strip over the ruched part and sew the ends together. And, Ta-da! Your knotted headband is complete!

Finished

Now show off your creation to the world, while looking cute and being warm, simultaneously!

November 16, 2012

Seed Stitch Knotted Headband: Preview

After we moved to the Midwest, closer to the great lakes, it's been an interesting topic to discuss with friends - how cold does it get here. The people from here always try to boast how much cold it is than the rest of the country (cue in the "one time during winter..." stories). But they almost forget we've lived in Eastern Washington for quite some time. So we don't scare that easily. Hey, I heard it snowed there already! We are still waiting for the season's first snow over here.

Well, putting the debate aside, I love me some winter accessories! And I've been meaning to make some of the cute headbands I see around the web. One of them was Stephanie's knotted headband. I love bows! And it's cute enough for an adult. Instead of making it with crochet, I decided to a make a knit version.

Seed Stitch Knotted Headband

Here's me - hopelessly posing with the headband on. I'm still trying to figure out how to do self-portraits with the new camera. Don't mind my messy weird hair. I think the headband looks pretty good, no? I also tested if it was warm enough for the winter months, and it passed with flying colors. My ears were quite toasty!

Selfie w/ HeadBand

I'll be posting the tutorial of this headband pretty soon. What fun things are you creating lately?